Points for architectural photography and editing with a smartphone that can be completed in the palm of your hand
An increasing number of people in the construction and real estate industries are using tokyo grapher's Wide Lens on their iPhones for business purposes, such as taking photos of the interior and exterior of buildings and on-site photography during construction.
Instead of using a large and heavy single-lens reflex camera, you can use your iPhone, which you always carry with you, and a small lens to shoot without distortion, even to the edges of the screen.
Jun ( @ima_ju ), a first-class architect and tokyo grapher ambassador who is active on the front line, teaches everything from the basics of shooting and editing architecture on the iPhone to points that convey the appeal of impressive spaces and exteriors. ) taught me!

Advantages of shooting with an iPhone
hello everyone. This is Jun (Instagram: @ima_ju ), a tokyo grapher ambassador.
I work for an organizational design office as a first-class architect, and am currently involved in the design supervision and supervision of a certain Olympic venue.
In my work, I often take photos during site supervision and inspections, and when I do so, I use my iPhone, which I always carry with me, instead of a camera.
I often use the camera when I know what I want to shoot in advance, and I usually shoot with my iPhone, which has excellent mobility.


[Photo.1] Architectural photos posted by Jun when he started Instagram
I started taking pictures with my iPhone when I got an iPhone 4s and started Instagram.
At that time, text-based mixi and twitter were the mainstream, but Instagram was specialized for single photos, so taking pictures with an iPhone and posting them was simple and fun, and it became a daily routine.
It's not that the frequency of shooting has increased because it's a mobile device like the iPhone, but it's the outstanding compatibility with SNS that allows you to complete the process of shooting → editing → posting on the iPhone in the palm of your hand. This impulse drove me to take pictures.

Wide angle of view of 18mm that makes the most of the architectural scale
Since I started using tokyo grapher's Wide Lens, what I shoot hasn't changed much, but the angle of view, which is different from that of a standard camera, was refreshing, and at the same time I was motivated to shoot with my iPhone, and at the same time, the frequency of shooting naturally increased. bottom.
In addition to architectural photography, photography of natural landscapes is also one of them.
At work, you may suddenly need to take photos on site.
In such a case, I set the Wide Lens on the iPhone in my pocket and actively use it for the purpose of taking beautiful pictures of a wider range.
-

[Picture 2-1] Without Wide Lens -

[Picture 2-2] With Wide Lens
When shooting architecture with an ultra-wide-angle lens, if the focal length is 18mm or longer, you will not feel anything out of place. It's going to be a lot of people who are in the middle of the day.
In particular, the phenomenon that the image is stretched at the edge of the angle of view begins to occur here and there.
tokyo grapher's Wide Lens has a focal length of about 18mm, and there is no visual discomfort on the screen, no deterioration in image quality, no color change, and very little distortion, so I actively use it when taking architectural photos. .
The camera app used for shooting is the iPhone's standard camera, and the grid display makes it easy to align parallel and vertical. Of course, you can tap the area you want to focus on and move the sun mark up and down to adjust the exposure, but pan focus depending on the amount of light. .
*Pan focus = The entire subject is in focus

Interior shooting point
Now, I will introduce three points that you should be aware of when shooting the interior.
- Determining the range you want to include in the angle of view and deciding the shooting position
- Include the floor, wall and ceiling to capture the space firmly
- Take a step back and shoot while being aware of parallel and vertical
Determine the shooting position by determining the range you want to include in the angle of view
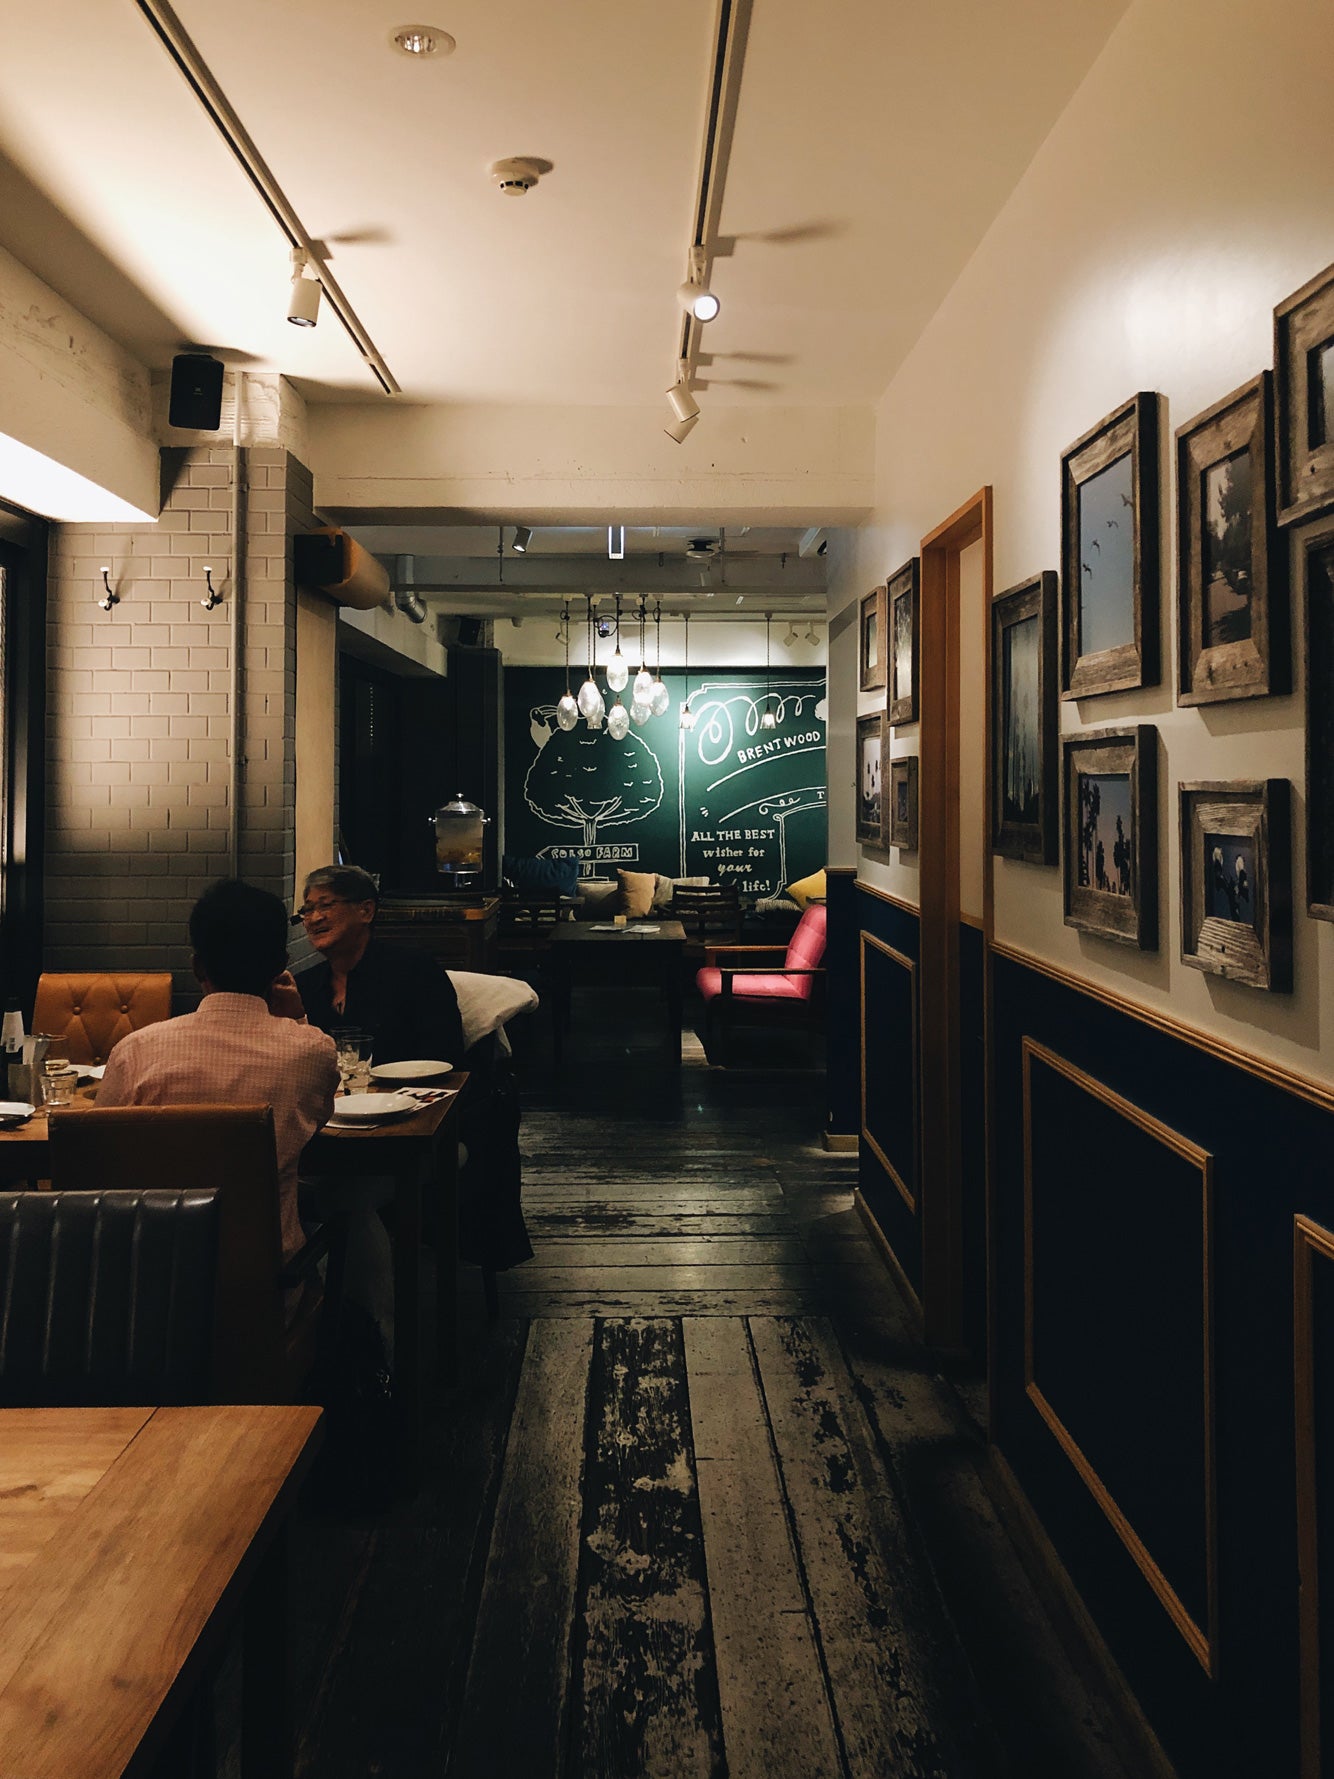
First of all, let's move yourself and find an impressive place in the naikan.
It depends on how far the angle of view is, but it is most effective if the center of the place is in the center of the screen.
If the area to be photographed has characteristic ceilings, walls, lighting, and other familiar furniture and accessories, it will be easier for the viewer to imagine spending time in that space, and a sense of scale will also be conveyed.
For example, instead of shooting just one element, such as the entrance or just the kitchen, by incorporating continuous spaces such as the entrance and the corridor, or the living room and the kitchen, it is possible to create an image of usability and the intention of the place. and how it looks will be easier to understand.
In addition, the obscurity effect = there is an object in the foreground, and the scenery ahead is partially missing, or it is vignetted and invisible. You may be able to take a picture that attracts interest and interest in the next one .
-
[Photo 3-1] Shoot without including the front space in the angle of view -

[Photo 3-2] Shoot with the front space in the angle of view
When deciding the angle of view, please be careful about the eye level = the height of the line of sight.
The height of the line of sight, which is extremely high or low, which is not actually seen, tends to result in photographs that do not involve actual experience.
The basic height for shooting is about 1.5m, which is the height of an adult's line of sight when standing, but if it is assumed that the person will be sitting on a chair or sofa, it would be better to shoot while sitting.
Also, when shooting with a wide lens, if the wall or pillar is too close to the lens, the perspective effect peculiar to the wide-angle lens (such as the phenomenon that the image appears to be stretched extremely at the angle of view) often occurs. , It is also necessary to pay attention to the sense of distance from nearby objects.
● Floor, wall, and ceiling are included to create a solid space
When deciding the angle of view, it is essential to include all the floors, walls, and ceilings that make up the space.
If either the ceiling or the floor is missing, you will not be able to grasp what kind of space it is, so be sure to follow this.
Make sure that at least one side of the wall, either the left or the right, enters.
People tend to take it for granted that a vertical space should be shot with a vertical composition, and a horizontal space should be shot with a horizontal composition.
You may be able to get a perspective that you didn't realize when you were shooting, so shoot in both vertical and horizontal composition for ease of comparison and reconsideration.
Also in this case, be careful that the floor, wall, and ceiling fit together.

This photo is taken of the space that caught my eye as soon as I entered from the entrance.
The impression of the moment you enter the space is captured as it is, and as a result, the composition is designed to encourage interest in the upper floor , avoiding the fact that you can see everything up to the second floor facing the atrium.
In a small building, if you can see all the space, you may feel cramped .
Dividing a space into small pieces and connecting them together is very effective in realizing and experiencing the space as a richer place.
On the other hand, it is also necessary to always be conscious of giving a sense of “depth”.
The act of facing and looking straight is not so common unless there is arbitrariness or intention.
People move and experience things in that flow.
Therefore, except for extreme ones, architectural photos taken at slightly left and right angles are rather natural and honest photos, making it easier to capture depth.
It's easy to understand if you imagine a tunnel, but I think you can see the difference in how you feel the depth when you shoot this from the front and when you turn the angle.
So far, I have explained about the “ground” in spatial photography.
In fact, the secret is that the famous Fritz Hansen Egg Chair and Taro Okamoto's mysterious painting are included as a "figure" (laughs).
It's a good complement to the space, isn't it?
Take a step back and shoot while being aware of parallel and vertical
It is preferable to align both horizontally and vertically when shooting, but it is common for one of them to be misaligned, so if you align even just horizontally, it will be very easy to edit later.
If you need vertical correction, let's handle it by editing (vertical correction here means tilt correction).
-

[Photo 5-1] Taking a step back -

[Photo 5-2] Image corrected and trimmed
However, extreme vertical correction will reduce the height of the angle of view of the composition, so please be aware of the effort and how it will look later.
Taking a step back (=shooting on the wide-angle side) is one of the best ways to take photos that are parallel and vertical without compromising the ideal angle of view.

Appearance shooting point
Next, there are three points that you should pay attention to when photographing the exterior.
- Determine the composition by finding the distinctive parts of the appearance
- Shoot not only the architecture but also the surrounding scenery
- Pay attention to the sense of scale and everydayness, and be conscious of the "entourage"
● Determine the composition by finding the characteristic part of the appearance
As with interior shots, when shooting exterior shots , observe the distinctive parts of the building's shape and materials, and move around to find a composition that emphasizes them .
Exterior shots are strongly affected by natural light, so although it is generally best to shoot from the front, it may be better to shoot at a slight angle depending on the lighting conditions.
Look at the exterior from various angles and decide on several possible shooting positions.
If the road in front is too narrow and you cannot get enough coverage with the wide lens, you may want to try to tilt the camera to the extent that it is not excessive.
However, please be aware of the vertical correction later.
Also, in the case of backlight, pay attention to the focus point (tap point) and be careful not to overshadow the building.

When I took this photo, I first searched for an angle where the natural light hits smoothly, and observed the texture of the wall material = the unevenness of the paint and the appearance of the luster. After confirming that a wide lens can be used to obtain sufficient contrast, I focused on capturing the two walls at the same time, centering on the corner of the building, by taking advantage of the angle of view from the crossroads.
In addition, on the wall with large triangles as modules, each triangle panel seems to have its own slope and angle rather than standing vertically, and the sharpness of the skyline (outline) is also characteristic. For this reason, I chose a "tilt composition" that emphasizes these elements. In addition, we are aware that there is glass in the gaps between the triangular panels, and we are focusing on preventing "blackout" so that reflections on the glass surface and transparent objects do not disappear.
● Shoot not only the architecture but also the surrounding scenery.
When photographing the exterior, not only the building but also the surrounding environment is important, so be aware of the location of the building.
Also, if the building is vertically long, or if the vertical direction is clearly emphasized or emphasized, shoot with a vertical composition. The best recommendation is to shoot both vertically and horizontally without hesitation .
-

[Photo 7-1] A photo taken with a vertical composition -

[Picture 7-2] Photo taken with horizontal composition
Looking at these two photos at the same time, the size of the building in the distance and the scenery of the lawn and water basin make it possible to imagine that it is a symbolic building with a relaxed natural environment.
Both vertical and horizontal composition shots include the surrounding scenery, but it was important for the vertical composition photos to be recognizable as "large protruding eaves" of the concrete eaves.
On the other hand, in the horizontal composition of the photograph, I emphasized how to relate to the wide surrounding environment, especially the relationship between the water basin and the building, which is a wide feeling combined with the landscape that continues to the architecture.
In other words, it is easy to see that while the architecture is the main character in the vertical composition, the horizontal composition is a “plus alpha” photo that gives depth in various ways due to the relationship between the architecture and the surrounding environment. think.
Neither is good or bad, and it is a good idea to use them appropriately according to the purpose of use.
● Pay attention to the sense of scale and everydayness, and be conscious of the “entourage”
In an urban landscape filled with diverse buildings such as mid-to-high-rise buildings including office buildings and commercial facilities, we also focused on elements that highlight the traffic of people, the daily flow of people, and the sense of scale of the building. Let's be conscious of including the "entourage" of .
This person may be able to appeal the value, role, and appearance of the target architecture more strongly. Since architecture is also a symbolic existence with sociality, it may be good to be conscious of the depiction of the relationship with the surrounding landscape as one of the important things.
-

[Photo.8-1] This modern building, with the sea and mountains in the background, makes us look forward to the view from the building. It tells me something. -

[Picture 8-2] The hustle and bustle of the big city and the dizzying flow of time can be felt from the density of the cars and pedestrians in the buildings that are integrated with the advertisements. -

[Photo 8-3] The scenery of pedestrians and cars lined up in the background of a building that looks like an apartment complex reminds us of a peaceful holiday rather than an office district. -

[Picture 8-4] The atmosphere of pedestrians and taxis crossing the road gives us a glimpse of the carefree daily life and sense of Rio.

Editing app and editing point used
Let's move on to the points of editing when we have covered the points of shooting the interior and exterior.
There are three main apps I use for editing architectural photos: VSCO, SKRWT, and snapseed.
In addition to distortion correction and basic corrections such as brightness, contrast and saturation, VSCO also performs filter processing in some cases, and then partial correction and sharpness are added with snapseed.
Use SKRWT if the tilt is severe or the distortion is severe.
Editing including VSCO is a case of "architecture as a photograph" on the assumption that it will be posted on SNS such as Instagram, and it has a little playful element. On the other hand, in the case of showing the architectural appearance as accurately as possible = "architectural photography", SKRWT is used to correct distortion, and snapseed is used to correct brightness, contrast, saturation, etc., and add sharpness to the original image. We will focus on reproducing colors and edge sharpness.
This time, I would like to introduce the editing points of “Photography as Architecture” .
- App used this time
- Firmly correct distortion and parallelism
- Focus on detail corrections so that the actual colors, shadows, and lighting are not excessive
- Consideration of deterioration of image quality so that architectural materials are faithfully reproduced
● The app to use this time


SKRWTMore
App specialized for distortion correction
When you start the app, a screen will appear to select the correction method from SKRWT , MRRW , and 4POINTS .
The top SKRWT is used for distortion correction.


snapseed
An editing app that allows you to make basic and partial corrections to images
There are two tools used for editing : image adjustment and detail .

Now, let's take this [Picture 9] as an example and explain the points of editing.
Firmly correct distortion and parallelism
Use SKRWT to correct distortion and parallelism.
Grid display is effective because it makes it easier to align parallel and vertical lines.
When editing, be careful not to forcibly align the parallel and perpendicular to the composition of 1-point perspective or 2-point perspective = perspective.
If possible, pay attention to parallelism and verticality when shooting, and try to avoid excessive correction or large cropping in the app.

There is a slight tilt at both ends of the photo, so fine-tune it so that it is facing the right way.
Unless it is intentional, be aware of as little tilting and tilting as possible when shooting.

After tilt correction, the image at the edge of the angle of view is also deformed, so trim it after correction.
In addition to trimming, fine-tune rotation as needed.
● Focus on detail corrections so that the actual colors, shadows, and lighting are not excessive.
I use snapseed to edit while repeating fine adjustments so that the actual color, incoming shadows and light are not excessive .
In addition to the overall brightness correction, we are careful not to create a discrepancy with the actual space by slightly emphasizing the saturation and contrast.
It is also important to pay attention to blown-out highlights and adjust the highlights.
At this stage, create a number of example patterns and select the one that you are satisfied with.
-

[Picture 11-1] Functions used for color correction -

[Photo.11-2] Partial correction of highlights (red part)
Based on these, the points for detailed correction are as follows.
- 1) [Brightness, color temperature, highlight correction] Fine-tune the dark/yellow tone of the entire area due to the underexposure to the appropriate natural light tone. (slightly bright and bluish)
Correct the exposure and white balance appropriately while paying attention to redness as well as yellowness and blueness. - 2) [Brightness of the sky, partial correction again] Be careful not to make the blueness of the sky too strong and change the color of the background.
- 3) [Contrast adjustment] Adjust the contrast so that there is no extreme difference while being careful not to crush the shadows and the background.
- 4) [Partial Brightness and Contrast Correction] In order to emphasize the difference between the shadow area and the sunlight area, focus on a certain part of the sunlight range and perform partial correction to make it brighter.

Let's aim for depiction with a sense of depth and three-dimensionality by paying attention to overexposure and underexposure. Focus on areas that are likely to be effective and make partial corrections.
● Consider the deterioration of image quality so that the architectural materials are faithfully reproduced.
If you increase sharpness or detail too much, it will lead to deterioration of the image, and the texture of materials such as tiles and wood grains may become excessive, so try to adjust both sharpness and detail at around 10.
If I set either sharpness or detail above 5, I set the other below 5.
Also, in the case of the exterior, if you focus only on the main building, the surrounding areas such as the sky, the building behind it, the surface of the water, and the roadbed may cause a moire effect or a jaggy effect * of lines . Pay attention to the sharp balance of .
* Jaggy effect = Lines that look jagged because they are too sharp

Performs detail (clarity) and sharpness corrections to prevent moire and jaggies on the dot patterns and joint lines on the walls.
The smaller the image, the stronger the moire and jaggies, so I am careful with the adjustment value.
Here is a photo edited with the above points in mind.
-
[Photo.13-1] Before correction -

[Photo 13-2] After correction
Since it is an editing of "photography as architecture", you can see that I am focusing on correcting distortion and reproducing the original color and sharpness of edges.
It is recommended that you take some time off after completing the work.
If you look at it again in a few days, you may find that it's not working (laughs).
The impression of the finished product will change in just one day, so don't be hasty and try to "review" it.

Jun
Instagram: @ima_ju
After working at an atelier design office and a privately owned design office, currently works at a major organizational design office.
Until now, he has been involved in the design of museums, music halls, school facilities and complex facilities, etc. At the Olympic Games held in 2020, he will supervise the basic design and execution design / design supervision of a certain venue.
On the other hand, since 2015, when Apple Inc.'s global event “Shot on iPhone” was featured on billboards, magazines, Apple.com, etc. in Japan and overseas, photography, including architecture, has become a lifework. become one.
Jun-san, an architect who has been fascinated not only with architecture but also with iPhone photography, is also an ambassador of tokyo grapher.
The attitude of shooting with awareness of the connection between spaces and the relationship with the surrounding environment is unique to Jun, who has the perspective of an architect.
Please refer to the points I learned this time and try using the Wide Lens to shoot architecture!
Jun's Instagram feed is full of great photos besides architecture and iPhone shots. Please follow & check!